How Much Does a DIY Cold Plunge Cost?
What is the total cost to build a DIY Cold Plunge? This is by far the most common question I get, so in this article I will break down a few different options when it comes to pricing out your plunge.
If you are using my plans, I have 3 main options for you to choose from. The first is building a DIY cold plunge out of a stock tank - this will be the cheapest option.
Second, converting a freestanding bathtub into a DIY cold plunge and hot tub (by far my favorite DIY plunge to-date… and surprisingly not a huge additional investment on top of the stock tank build).
Last, and the most expensive to build is the Luxury DIY Cold Plunge. This uses a rectangular tank and has a very cool modern look and finish to it.
Of course, you can just add ice to your bathtub (or stock tank) and you’ve got yourself a cold plunge. But, over time this will get tedious and the cost of ice will add up, likely leading you to want a more legitimate DIY cold plunge setup for your ice bath routine.
So, let’s break down how much a DIY Cold Plunge costs.
Bare-Bones Stock Tank Cold Plunge | ~$800
- Stock Tank - $109.99
- Danner 950 - 109.99
- Active Aqua 1/4HP Chiller - $568.19
- Misc. Plumbing Fittings & Tubing/Hose - $20
Before we get into the fully insulated DIY cold plunges, you can start with a few of the primary components to make a bare-bones Stock Tank DIY Cold Plunge. You’ll have a functioning cold plunge without needing to drill any holes or do any heavy DIY… and the best part is that you won’t need to fuss with ice or frozen water bottles.
This is a great place to start because these components can be used in the more legit builds if you decide to up your game later on - the tank, chiller and pump (which can be used in-line or submerged) can all be used for the Stock Tank DIY Cold Plunge build and the pump & chiller can be used in any of the other DIY Cold Plunge plans.
A build like this is best kept indoors because without a cover or insulation, the chiller will run quite a bit to keep the water cool.
DIY Stock Tank Cold Plunge (Fully Finished) | ~$1,500+
- Stock Tank - $109.99
- Danner 950 - 109.99
- Active Aqua 1/4HP Chiller - $568.19
- Spa-124 Ozone Generator & Venturi - $109.95
- GE Filter Housing - $39.86
- Misc. Plumbing Fittings & Tubing/Hose
- Lumber & Siding Panels
- Insulation
- Misc. Building Supplies
The most cost effective way to build a DIY Cold Plunge that has all the same features as the models that are 4-10x the price is the Stock Tank Cold Plunge. Complete this project and you will have a fully insulated cold plunge with ozone sanitation, water filtration and 24/7 circulation. It’s fun to see all of the personal touches folks put into their builds - you can even choose to add an LED Light.
Not sure where to start? I have framing plans, plumbing plans and other helpful products at diycoldplunge.com. The plans come with complete shopping lists and direct links to purchase to save you the time and hassle of shopping - a serious time save when you get to plumbing your cold plunge!
There are so many cool ways to finish these builds off to really make them a conversation starter. If you want to save some DIY-time you can also purchase a quality insulated Stock Tank Cover here.
Make sure to check out the blog for customer interviews using this plan!
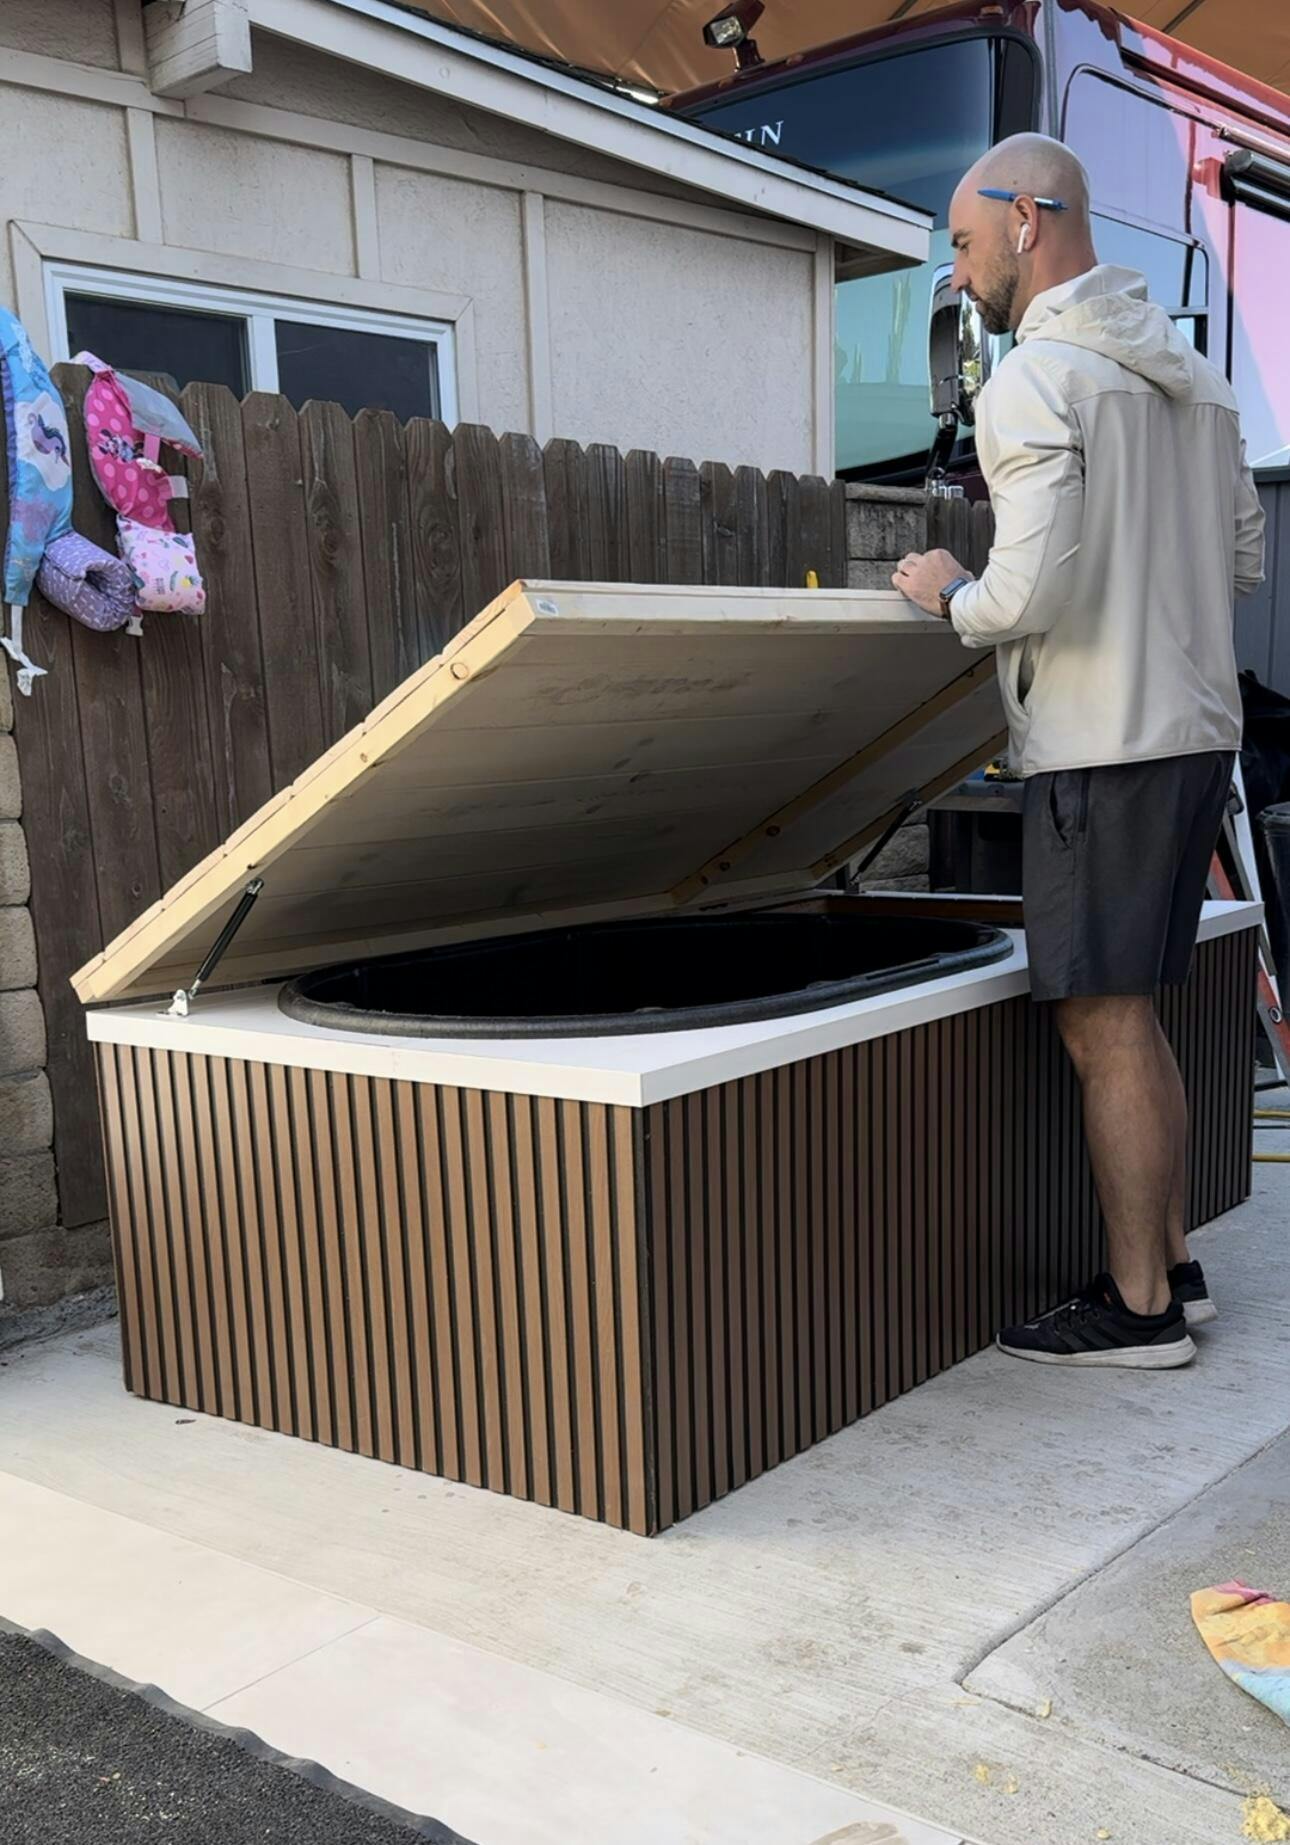
Bathtub Cold Plunge Conversion | ~$2,500+
My favorite DIY Cold Plunge, without question, is the Bathtub DIY Cold Plunge Conversion. This will compete directly with other plunges on the market, for less than half the price. Going this route also happens to be the easiest to build.
You can choose to add a heat option (I’ve gotten mine up to 107°F consistently) and cools down to 34°F (if you hack your chiller). Like the stock tank plunge outlined above, it includes water filtration, ozone sanitation, 24/7 circulation and a built in-drain that can connect to a garden hose.
This plan is a complete start-to-finish guide with shopping lists, direct links, diagrams and step-by-step video for the entire project. My goal was to make this project as simple as possible, and so far people are loving it!
You can also save money off of the estimate above and make it even more affordable by opting to skip the LED light, nix the heat option and build a DIY cover instead of purchasing the pre-made Insulated Spa Cover.
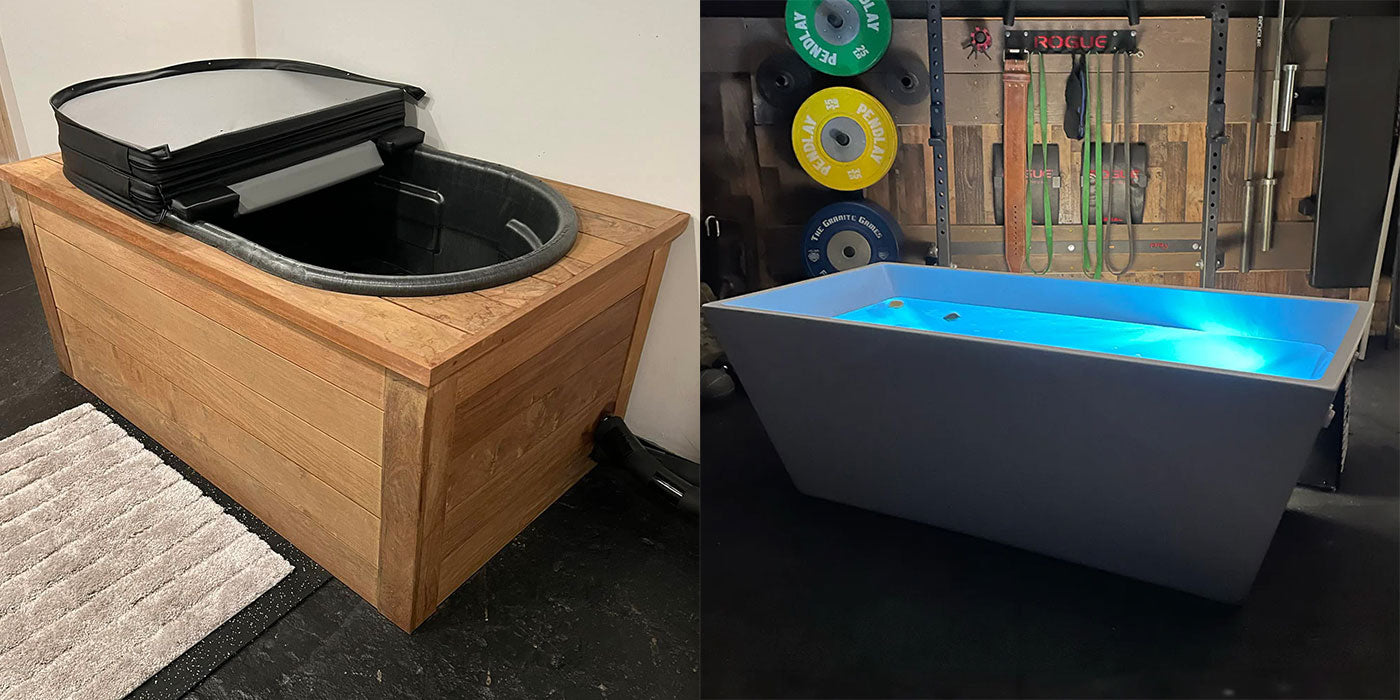
Luxury DIY Cold Plunge | ~$3,000+
The Luxury DIY Cold Plunge Plan has been the most popular, probably because it looks the coolest. Like the bathtub conversion, it is a complete start-to-finish guide to complete a luxury DIY Cold Plunge. I provide the complete shopping list with links, cut plan, plumbing plan, diagrams and video for each step of the way.
Aside from the modern look, the main difference is that the tank has you sit in an upright position. This can be hit or miss for what people prefer with their cold plunge. You can either follow along step-by-step or modify the plan for a larger rectangular tank (it comes in several sizes). I’ve had many customers opt for the larger tank and modify the framing accordingly without issue.
Make sure to check out the blog for customer interviews using this plan!